As we all know, golf is very hard, and for some it is even harder. It seems that golfers are an independent lot and tend to pick up the game, play and practice, with little regard to using the proper fundamentals at first. It’s only when they have “learned how to hit the ball” do they seek out any form of instruction. Sometimes by this point they have ingrained some damning mistakes — what I call Golf Death Moves.
On that note, I would like to pick out the Top Five Golf Death Moves I see from the average players and reveal how to make sure you correct them … before it’s too late!
Want an easy-to-follow but thorough road map to actually improve your golf swing? I give you the tools and directions you’re looking for to avoid what I call “early extension.” Read on.
TRAINING TOOLS NEEDED
2 – Shafts with grips: 37 inches to 40 inches
1 – Swim Noodle: 30 inches
Swiss Ball
5 lb. medicine ball or weight (in photo is the 6 lb. Swing Ball Pro found at smartbodygolf.com)
IDENTIFYING EARLY EXTENSION
In order to identify what I call “early extension,” we first have to draw two important lines, as I’ve done in the photos below. The first line is a vertical line on your backside, as if you are up against a wall. The other important line is a horizontal line at the top of your head, as if the top of your head is touching a roof. The backside line will help identify early Eextension. During the golf-swing, if your backside comes off this line, you are early extending. Although it can occur in the backswing, it is more prevalent in the downswing and follow-through.
I have been on the golf course many times when a lady has cold-topped it off the tee and/or hit a worm burner. The first thing her husband says is, “Honey, you lifted your head.” This is the worst advice you can give a golfer. Once a golfer hears “keep your head down,” they are often so worried about lifting their head they put their it down and tuck their chin in, which leads to rounded shoulders and poor golf posture, as I’m demonstrating in Photo 1.
If the golfer tries to hit a shot with this set-up they almost always hit another shot that dribbles off the tee.
Here is the issue. When golfers hit the skinny, low shots off the tee or in the fairway, they did not “lift their head,” they came out of their posture (Photo 2). Usually they have either straightened their legs, or more commonly they have lifted their torso as they came through impact. That results in players hitting the ball on the bottom of the club face, very poor contact and a lack of distance.
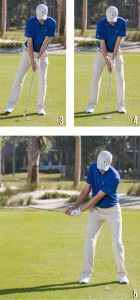
To correct this shot, instead of “keeping your head down,” focus on keeping your chest level through impact or think of brushing the grass with your club face. Both swing thoughts will lead to maintaining your posture throughout the swing and more center-of-face hits and better ball flight. Photo 3 shows good posture at set-up. Work on this diligently on the practice tee, using training aids if you can, and soon you’ll be striking the ball with far more consistency, power and accuracy.
Lisa “Longball” Vlooswyk is an 8-time Canadian Long Drive Champion for Women. She is a keynote speaker, golf journalist, golf entertainer and just launched a new Instructional video. Lisa can be reached through her website www.lisalongball.com or through Twitter @LisaLongball
If you struggle with a slice or a hook and inconsistent ball striking, your club path at impact may be the issue. Crooked and inconsistent ball striking is not a good recipe for low scores.
Try this simple drill to see where your path is and to fix it for better ball striking.
TEE IT UP FOR CORRECT PATH
To eliminate the “over the top” or outside-to-in club path for slicers try this simple drill:
Place two tees in the ground, one about two (2) inches behind the ball and approximately three (3) inches outside the target line. The second tee should be two (2) inches in front of the ball and approximately three (3) inches inside the target line. Bend both tees so they are approximately on the same angle as your club shaft. See Photo 1 for the set-up with an iron, and Photos 2 and 3 for setting the tees up for driver.
For a driver, place the back tee approximately 4.5 inches outside the target line then bend it parallel to the club shaft plane (Photo 4).
Make swings using the tees as a gate, swinging to the right of the target while missing the tees. In Photos 5-6, you can see that to avoid the tees the path of my club, indicated by the club shaft, points well right of my tee line.
CLOSING THE CLUB FACE
If you haven’t played a draw before (a right to left ball flight), you will most likely need to facilitate the turning over of the club face to match your new club path. To do this, make sure to start turning your right forearm over your left as you start your downswing. This motion may feel like a flipping of the club initially, but as you turn your body through the shot faster, this turning motion will delay the turning over of the club until after you’ve hit the ball. (Photos 7-8).
Note: In photos 5 and 6, the gray arrow represents the ball path, while the red arrow represents the club path.
To eliminate pushes and hooks resulting from a club path that is too much to the right, simply reverse the tee positions so that the tee outside the club head is in front of the ball and the tee by the heel of the club is behind the ball (Photo 9). Again, try to make swings where you miss the tees.
A few minutes of swings with tees set up in the above manner can help you merge your feel with the reality of your swing direction and club path. Fix yours and you will be well on your way to better ball striking and lower scores.
Dale Abraham, PGA, is Director of Instruction at Bighorn Country Club in Palm Desert, California, in the winter and Telluride Country Club in Colorado in the summer.
All of us, at some time or other, have experienced the uneasy feeling that our golf swing is out of sync. It feels like we don’t have any rhythm or timing at all. Believe it or not, all you may need to get your swing in sync is a few moves using the waltz rhythm to put you back into your groove. Even if you have never danced a waltz or you say you have no rhythm, you can make this work.
I have used this method of teaching the golf swing successfully to hundreds of people. I know there are pros, like Sir Nick Faldo, who say just count 1 – 2 for a smooth swing. To get into a rhythm you need more than 2 counts. The waltz rhythm is 6 counts — 1, 2, 3, 4, 5, 6 — and it is a very natural rhythm for any swinging movement. Each count takes the same amount of time to execute and it doesn’t matter how fast you count so long as each number takes the same amount of time.
The take away starts on the one and the backswing finishes on the three. The downswing and actual contact with the ball occurs on 4 and the follow-through is during 5 and 6. During your round while standing off to the side of a tee box you can swing a club while saying this rhythm in your mind. Try this: 1 – 2 – 3 – 4 – 5 – 6, or use this: Back 2 – 3 Through 5 – 6. The word back is the takeaway on count 1 and the word through is the contact on count 4. I must stress that each word/number must take the same amount of time to say. This rhythm works on all full swings, from wedges through long irons. Remember the completed backswing will take 3 counts and the downswing with contact and follow through will take 3 counts. The photo sequence below shows how to count out at the various points in your swing.
What if you don’t know what the waltz rhythm sounds like? There are countless waltzes in classical music that you can find on the Internet. There are also more modern pieces of music that use the waltz rhythm. My personal favorite for the golf swing is “Kiss from a Rose,” sung by Seal in 1994. A few others are the Beatles’ “Norwegian Wood” in 1965 and “I Want You” sung by Janet Jackson in 2004.
If you’re still not convinced this is the way to get your swing in sync, watch some video of professional golfers and use the 6-count waltz rhythm for each of their swings at normal speed, not slow motion. Some of them will have a faster tempo than others — for example, Kevin Kisner’s tempo/speed is faster than the swing of Justin Thomas and Justin Rose, who have about the same tempo. All the swings of these golfers fit the 6-count waltz rhythm.
If you want to watch an older golfer, watch Ernie Els’ or Fred Couples’ swings, which are very fluid, smooth, and rhythmic and fit the 6-count waltz rhythm too. Using the waltz rhythm will give you a smooth, repeatable swing that will be in sync every time.
Dr. Nelson Neal, was a university Professor of dance and physical education for 35 years and taught golf and tennis nearly every year. He was also the assistant golf coach at Marywood University in Pennsylvania and the Head golf coach at Lakeridge High School in Oregon.
Ask any great athlete what one characteristic they all share and you’ll hear a lot of the same answers. But one general theme will emerge: Regardless of the sport, balance is the common thread. So, it’s time to look at balance basics for golfers.
Balance is what allows us as human beings to walk erect and not fall over. Balance is what allows us as humans to increase our speed of movement when participating within a sport. And it’s poor balance that tells our bodies to slow down the moment anything threatens our ability to remain upright. Without great balance, your ability to maximize your club speed at impact diminishes. And without great balance, the chance to place the club face square to your intended target diminishes.
Are you “balanced” when you set up to make a swing? And are you “balanced” when you swing? Again, let’s explore some balance basics for golfers.
CLOSE YOUR EYES
You have five senses. You only use three of them when making a golf swing — your sight, your hearing, and your touch. If we cut one of those senses off, the other two must become more acute. And if we cut off your vision, your touch becomes the only sense your brain and body can use to assist your equilibrium and keep you balanced.
Here is a simple exercise you can use to determine if you create a balanced at set-up position. Closing your eyes to force your touch or “feel” to gain valuable data will determine if you are in the correct position to make a swing with every club.
FULL SWING BALANCE
Set Up as You Normally do. Close your eyes and determine:
How much weight is on your toes versus on your heels?
These images from BodiTrak show weight distribution through the stroke — weight forward (top), weight back (center) and slightly forward with equal distribution between heel and toes (bottom).
Ideally, for a full swing shot, regardless of the club you have in your hand, proper weight distribution between toes and heels is equal balance. Golf is a sport where you create the action versus reacting to an action. When you need to react, having more weight in the balls of your feet makes sense, so you can be quicker to react. But in golf, having more weight in the balls of your feet can cause adjustments in your swing to counterbalance the disproportionate amount of weight in your feet. These movements can cause poor swing paths, club faces not square to your intended target at impact, but worst of all, deceleration of the club as it makes impact with the ball.
The BodiTrak system uses electronic sensors to measure ground pressure through the golf swing or putting stroke, the foundation of all weight transfer.
Be sure that when taking your set-up or address position, you determine and distribute your weight equally between your toes and your heels. Use the instep of each foot as the determining body part to feel the difference. If needed, close your eyes and make the change of balance between toe and heel so your body has a chance to feel the difference, and remember that difference with a feeling you desire to create more often.
How much weight is on your right versus your left side? Based on the swing methodology you subscribe to, there are many different opinions as to how much weight should be on either side of your body as you set up. As a rule, too much weight towards one side or the other will create an equal and opposite effect on your swing as you put the club into motion.
So, what is the correct weight proportion to each side? Simple — the one that allows you to make a weight transfer that is consistent and efficient. Here’s the math behind this simple philosophy. Ask yourself this question: if the average swing last approximately 1.26 seconds, do you have enough time to make a complete weight transfer from the back side of your swing to the front side of your swing that allows the club to accelerate through the golf ball at impact?
If the answer is no, because too much weight remains on the back side of your body when you complete your swing, then you started with too much weight on your front side at set-up. The opposite can be true. Too much weight on the back side of your set-up position can cause an irreversible sway forward and past the golf ball, causing an early release, among other things.
Adjust the weight balance of your set-up the same way described earlier, close your eyes and make the adjustment. Doing so allows your brain and body to feel the difference, which will most likely with repetition create a more balanced set-up position you are looking for.
SHORT GAME BALANCE
Short game shots require more accuracy than distance, making a full weight transfer less vital as the shots and clubs to hit those shots gets shorter.
As a rule, “posting up,” or leaning to the front side of your set up can lessen the amount of weight shift, while organically shortening your swing. Setting approximately 60 to 65 percent of your weight into your entire front side, not just the foot, allows for a downward motion of the club, causing the ball to go up at impact. And it also allows you the ability to rotate around the front side of your swing as you swing through the ball and release the club.
As with full swing shots, toe-to-heel balance remains in the in-step of your foot. Being too far out to the toe will force your body to bend the front elbow, or “chicken wing” as it’s commonly referred, to bring your body back to balance.
PUTTING BALANCE
The more stable the lower body during a putting stroke, the better. This means that heel-to-toe weight distribution has to be equal regardless of the putting style and putter you choose. You can favor the front side of your stance, as most great putters do. But be sure not to place too much weight to the front side, which produces a bouncing putt from the moment of impact.
Here are a few drills you can do in your backyard to create better balance in all your set-up positions:
Full Swing
There are various “onefoot” drills to help you feel proper balance, including the clock drill in which you move one foot through various clock positions —noon to 6 o’clock with your right foot (shown here) and 6 to 12 with the left foot.
Stand on One Foot Drills (see photos) – All the variations described in this drill were provided by fitness experts during rehabilitation sessions I personally experienced or provided my clients during a golf fitness session with my fitness professionals.
Place one leg in front of you with your toe pointing toward you. Stand on the one foot for 30 seconds. Repeat with the other leg. This drill helps with ankle stability and allows your body to understand how to balance towards one side or the other, a requirement within a good golf swing.
Clock Drill – Standing on one foot, bring other foot forward toward 12 o’clock. Then remaining standing on the same foot, point the other foot at the 12 different clock positions. This drill will not only assist you with balancing a simple movement, it will also start working on the core skeletal/muscular structures that facilitate a great golf swing.
Throw the Ball Drill – I’ve featured this drill in previous Golf Tips features. This time, the emphasis is holding a completed finish position that is well balanced.
The “wedge under the back foot drill” helps you feel how weight should be distributed at address for the full swing, evenly distributed between heel and toe with slight pressure on the inside of the trailing foot.
Wedge under Back Foot Drill (see photo at left) – If your weight transfer at the beginning of your swing sways backward, this drill will sure-up the back foot, keeping the balance point within the instep.
Towel Under Feet Drill – Try making swings while standing on a rolled-up towel. You’ll find if you can’t remain balanced during the swing from heel to toe, your swing will automatically slow down. Only swing within this drill as you can remain balanced. Small swings at first are OK to teach your body how to maintain balance while still delivering a complete weight transfer.
Short Game/Putting Balance
“Stork” or Back-Toe Drill (see photos below) — Point your back foot/toe into the ground, forcing weight forward as you chip, creating organic acceleration.
Ball Under Back Heel Drill — Same as the Back-Toe Drill but for people who have a hard time balancing. Place a golf ball underneath your back heel to gain the same effect.
Putting your trailing foot back and on its toes in a “stork” stance will force you to accelerate through the ball during chips and pitches. Keep your weight forward during a pitch shot’s short backswing to set yourself up for crisp contact. Stay down during follow-through while keeping your weight on your front foot.
Putting
BodiTrak Balance – Should show little to no weight shift and balanced heel to toe
Balance Related to Eye Position Over the Ball — A couple items are certain with putting balance. If you have too much weight in your toes, it’s likely your eyes will be too far over the ball and line of your putt. The opposite is true; should there be too much weight in your heels, your eyes will most likely be too far inside or away from the ball and your intended target line. Take videos of yourself from down the line in a well-balanced position when attempting a putting stroke to determine if your eyes are in the right place.
Every day we balance our lives and our careers. And every day our bodies and brains balance the movements of those activities to allow us to move the most efficient way possible. Why not do the same for your golf swing?
John Hughes is the founder of John Hughes Golf in Orlando, Florida. Reach him at john@johnhughesgolf.com
Pure contact with the golf ball and turf is perhaps the best feeling a golfer can experience. Unfortunately this experience is not what most golfer experience on a shot to shot or day to day basis. The fat and thin golf shots have one thing in common, the bottom of the swing is too far behind the ball.
Let’s look at a few reasons and fixes this may be happening in your game and find a solutions to assist you in finding golf’s “utopia” feeling.
No. 1: Ball Position
Fixing your fat and thin shots could be as simple as the ball being too far forward in your stance.
Work on your set up with a mirror to feel like a vertical line would intersect down from your left eye through your hands and through the ball, as in Photo 1. From this positon you are in a good start to return the club to a proper impact position, as in Photo 2.
No. 2: Excessive Head Movement
In an effort to create power, players will often move too far off the ball to the right for a right handed player (Photo 3). If a player fails to move back to the left at impact their weight will remain on the trail leg and the club will bottom out before impact.
Have a friend hold a club or alignment stick outside your right ear as you make a few practice swings and ultimately work up to hitting full shots with a ball (Photos 4 and 5). This might feel strange or limiting at first, but with a little practice the bottom of your swing will bottom out in the correct spot and you will begin to produce center face contact with the ball.
No. 3: Reduction of the Length of the Arms at Impact
It does not take long after hitting the ground behind the ball that your arms will figure out how to shorten to avoid this impact condition. The result is now you a thin shot and it is bladed across the back of the green. I show this position in Photo 6.
Take a moment to paint a line on the ground and hit balls resting on top of the line next time you go to the practice range. I show this sequence in Photos 7 through 12.
After a few shots you will become aware of the buckling of your elbows just prior to impact and the shaft leaning back away from the target.
Strive to make contact in front of the line hitting the ball then the turf and you will begin to allow your arms to lengthen at impact correctly at impact with the hosel and shaft leaning towards the target at impact, as in Photo 13.
No. 4: Club Points Too Far Right of the Target at the Top of the Swing
From this position (Photo 14) the club will tend to rebound and approach the ball too much from the inside the target line at impact. Players with this condition will also tend to block and hook the ball away from their intended target.
Feel as though you rotate the left forearm over the right in the backswing to have the club pointed at the target or slightly left of the target at the top, as in Photo 15. You can create this feeling by taking a basketball or range ball basket and feeling like you rotate your forearms over your right shoulder at the top (Photo 16).
From this positon the elbows are squeezed closer together and you are poised to deliver the club correctly to the ball for a solid strike.
Editor’s Note: This story was updated June 28, 2018.
Dave LaFata is Head Golf Professional at Toiyabe Golf Club in Washoe Valley, Nevada
All of the quality golf coaches I have spent time with stress the importance of starting your swing with a good movement. They attribute many of their student’s swing issues to poor set up and first move, and spend considerable time and effort in trying to teach and train improvements in these areas. The GravityFit TPro can help with this crucial movement.
The takeaway is something that seems easy but in reality is very difficult to repeat on a consistent basis without practicing the correct movement pattern. Getting this part wrong happens to me all the time, so I’m very familiar with this problem. This is demonstrated in the video clips throughout this article, taken from a lesson delivered to me by Richard Woodhouse. They have been selected to deliver practical examples of how changing set up and early backswing movement can have a really positive effect on the rest of the swing.
The start of your swing is a bit like hitting a putt towards the hole; if you start it off on the right line, the chances of it going in are greatly increased. If you start your backswing in the right way then better positions will be achieved throughout your swing, leading to a much simpler downswing and more consistent strike.
In the video above you can see Richard using the GravityFit TPro to firstly help set my right shoulder better. Richard sees this shoulder position as critical in helping me achieve better rotation from my T-Spine and Ribcage, taking the first steps toward making a better start to my swing. What Richard is aiming to achieve is essentially a backswing that starts with more arm-body connection, moving the arms and body together in the takeaway. All too often people move their arms independently of their body, creating a mismatch and getting off track early.
As you can see, it’s quite a different feeling for me to be rotating my upper body over a quiet lower body. Richard felt it was important that we established the new feel for an improved movement without club in hand. Even though the change is quite subtle, the presence of a club and golf ball could distract me from focusing on how this new movement feels.
It wasn’t long until we move on and starting rotating to a fully completed backswing from the new and improved connected takeaway. I found it much simpler to complete the backswing, once I was better established in set up and first move. It felt like I was on track and simply had to continue turning and everything would fall into place. So often in the past, I have had the feeling of not knowing when and where to complete my backswing and start the move down.
Finally you can see in the video below, we put club in hand and got back to a live ball scenario, where we started to see some nice improvements in contact and ball flight. This all stemmed from focusing on doing a better job with key postural muscles that control the shoulder blades and upper back, critical to developing the stability and feel for the arm-body connection. This led to making a better first move from an improved set up position, thus allowing the rest of the swing to work from an improved foundation.
If you would like to try out the featured drill, follow these simple steps:
Push handles out in front of your body, keeping slight bend in elbow
Stretch tall, feel green spikes in your middle/upper back and shoulder blades on the paddles
Hinge forward into golf posture
Slowly turn chest into backswing, keep arms out in front of body, and maintain pressure on the spikes and paddles.
Keep the lower body quiet as you continue to turn and complete your backswing.
Return the start position and repeat for 10 reps.
Rest for 30 seconds and repeat. You can then go on to introduce a club and ball with the aim of transferring the new move to a full swing scenario.
The aim is to firstly establish great golf posture and then practice that connected takeaway movement detailed above. This should lead to a more complete backswing with good width and turn, which can facilitate a quality downswing move and strike. Hopefully this drill, over time, will have a similar positive effect that it did for me during the lesson with Richard.
For more on the featured GravityFit TPro, click here.
Richard Woodhouse is Director of Instruction at KDV Sport on the Gold Coast, Australia. KDV Sport is a state of the art Golf and Tennis facility that offer facilities and instruction to suit every level of golfer. Find out more.
While a lot of golf instruction focuses on ridding a student of a slice — it is, after all, the most widespread problem among amateurs — not enough attention is given to the other shot that bedevils a lot of golfers, especially from the tee: The Duck Hook.
It’s a nasty shot that often goes deeper into the junk or trees or water than a slice, simply because it has more topspin and is usually on a lower trajectory. The old adage “you can talk to a slice but a hook won’t listen” is definitely true.
The duck hook is caused by a combination of issues, starting with the grip, so let’s tack them one by one.
This “Gorilla Grip” can be causing excessive shutting of the clubface (Photo 1). Try to let your right arm hang freely, then grip the club with your right hand and palm facing more downward versus palm to the sky.
POOR CLUB PATH AT IMPACT AND FOLLOW-THROUGH
If you feel like the club is exiting too high and right on the follow-through (Photo 2), you’ve probably hit either a weak push or, yes, a duck hook — the latter because such a swing path will result in clubface shutting too quickly and loss of posture.
POOR WEIGHT SHIFT
The “hang back and flip” move (Photo 3) — in other words, not initiating the downswing with your lower body, leading to the dreaded over-the-top move — will make your swing rely completely on timing and expose you to both blocks and hooks.
THE SOLUTION
Let’s concentrate on the moment of truth, the downswing, to get you on the path to straighter drives and send the duck hook packing. Try this: Ditch the inside out move and instead send the club and arms DOWN and IN to stabilize your clubface (Photo 4). Let the momentum of the club take you into a balanced finish, rather than getting stuck on your back foot.
Kristin Walla is head teaching professional at Orinda Country Club in Orinda, California
In looking at the greats of the game from yesteryear, many players lift the heel — the lead heel, that is — on the backswing and then slammed it down again to start the downswing motion. With the advent of technology such as Swing Catalyst balance plates, we can now see and measure the kinetics of the swing while assessing how footwork can affect club movement. Since working with the Swing Catalyst in our coaching at the Golf Learning Center, we have realized how such common swing faults as “early extension” and “casting” can be easily cleaned up with improved footwork. Also we have been able to create more power in clients’ swings by focusing on the timing of the foot-to-ground connection.
Before you start to work on downswing foot mechanics, let’s look at the start of the swing to create a foundation for what is to follow. At address feel as though you have 55% of your pressure on your lead side, as shown on the Swing Catalyst in our indoor practice facility (Photo 1, with an inset showing the percentage on the Catalyst computer screen) and on the course (Photo 2).
A great way to achieve this set up balance is with the following motion-based exercise. First, set up in your normal address position. Next, lift the TRAIL foot slightly off the ground and then put it back down to the ground (Photo 3). As soon as the trail foot hits the ground (Photo 4) swing the club back (Photo 5). This will give you a higher percentage of pressure on the lead side before you swing the club but you will easily shift the pressure to the trail side on the backswing.
Once you are comfortable with the balance in the set-up, it’s time to look at how you want to “unweight” the lead foot on the backswing. As your arms and club swing back, pressure will leave the front foot and start moving to the rear side so that by the top of the backswing you will have between 60% and 80% pressure on the back foot. Your upper body will have rotated within the spread of your feet; however, to help ensure the pressure has shifted to the trail side, allow your lead heel to lift from the ground. When the front heel lifts your front knee will rock inwards slightly towards the trail side, as in Photo 6 (on the Swing Catalyst, with inset showing this move on the computer) and Photo 7.
Now that you are loaded into your trail side near the top of the backswing, you have to aggressively move that pressure back towards the front side before your club changes direction at the top. Here is where the classic heel slam truly helps the body pivot in the swing. Aggressively push the lead heel back towards the ground early in the transition from back to downswing as in Photo 8 (again on the Catalyst, with the transition captured on screen) and Photo 9. This will move your front side of your body toward the target as your pressure quickly starts shifting back toward the target. This is a critical move with the body to eliminate early extension and casting. Your pivot will support the hand path and club movement on the down- and through-swing.
By slamming the lead heel to help sequence the downswing, your pelvis will move laterally to the target and drop slightly as your body squats into the ground by the time your lead arm is parallel to the ground. If your swing is plagued with early extension of the body on the downswing (Photos 10 and 11, with the Catalyst screen clearly showing weight out on the toes), this is a move that’s critical to blend into your downswing motion. When your pressure moves forward into your toes and stays there in the downswing, your pelvis has no option but to move inward toward the golf ball. This creates ball flight errors of blocks and hooks and general inconsistency of club movement through the hitting zone.
Casting of the club, also known as early release of the hands, from the top of the downswing is something that we see frequently in amateur players on the practice tee. This occurs when the lower body doesn’t move laterally early in the downswing so pressure stays, or often increases, on the trail side in the downswing. Photos 12 and 13 show this all-too-common flaw; the Catalyst inset shows too much weight remaining on the right side. By slamming the lead heel into the ground to start the downswing transition you will be able to keep the shoulders stable as your pressure moves towards the target. This lateral shift of the lower body keeps the hands relatively calm in the first half of the downswing so that it appears they wait until the lead arm is parallel to the ground to start pitching the club head out.
From this balanced and slightly squatted midpoint of the downswing, it is possible to start lining up the club at impact with the lead arm and make the hand path move up and inward, as in Photos 14 and 15 (the Catalyst screen shows almost full weight transfer at this point in the swing)
This is a powerful motion that also produces clubface control and accuracy of ball flight. Having the ability to push off both feet from the ground at near lead-arm-parallel on the downswing helps rotate and elevate the pelvis, which in turn aids the club head to whip through the hitting zone.
Having great footwork is important in any sport, so head to the range and instead of working on club positions, work on the movement of your feet. Lift your front heel on the way back and then slam it down again so you can use the ground to power your swing and increase your ball-striking consistency.
Tim Cooke is Director of Instruction at Sea Pines Resort on Hilton Head Island, South Carolina, home of Harbour Town Golf Links, one of the PGA Tour’s favorite stops. Read more about him and his golf school at www. seapinesgolfinstruction.com and follow him on Twitter @TimCookeGolf
Editor’s Note: This story was updated in April 2018




 If the golfer tries to hit a shot with this set-up they almost always hit another shot that dribbles off the tee.

 To eliminate the “over the top” or outside-to-in club path for slicers try this simple drill:
 Place two tees in the ground, one about two (2) inches behind the ball and approximately three (3) inches outside the target line. The second tee should be two (2) inches in front of the ball and approximately three (3) inches inside the target line. Bend both tees so they are approximately on the same angle as your club shaft. See Photo 1 for the set-up with an iron, and Photos 2 and 3 for setting the tees up for driver.
 Make swings using the tees as a gate, swinging to the right of the target while missing the tees. In Photos 5-6, you can see that to avoid the tees the path of my club, indicated by the club shaft, points well right of my tee line.
 Note: In photos 5 and 6, the gray arrow represents the ball path, while the red arrow represents the club path.
 To eliminate pushes and hooks resulting from a club path that is too much to the right, simply reverse the tee positions so that the tee outside the club head is in front of the ball and the tee by the heel of the club is behind the ball (Photo 9). Again, try to make swings where you miss the tees.
 A few minutes of swings with tees set up in the above manner can help you merge your feel with the reality of your swing direction and club path. Fix yours and you will be well on your way to better ball striking and lower scores.


 Pure contact with the golf ball and turf is perhaps the best feeling a golfer can experience. Unfortunately this experience is not what most golfer experience on a shot to shot or day to day basis. The
 No. 2: Excessive Head Movement
 No. 3: Reduction of the Length of the Arms at Impact
 No. 4: Club Points Too Far Right of the Target at the Top of the Swing
 Feel as though you rotate the left forearm over the right in the backswing to have the club pointed at the target or slightly left of the target at the top, as in Photo 15. You can create this feeling by taking a basketball or range ball basket and feeling like you rotate your forearms over your right shoulder at the top (Photo 16).

 While a lot of golf instruction focuses on ridding a student of a slice — it is, after all, the most widespread problem among amateurs — not enough attention is given to the other shot that bedevils a lot of golfers, especially from the tee: The Duck Hook.
 If you feel like the club is exiting too high and right on the follow-through (Photo 2), you’ve probably hit either a weak push or, yes, a duck hook — the latter because such a swing path will result in clubface shutting too quickly and loss of posture.
 The “hang back and flip” move (Photo 3) — in other words, not initiating the downswing with your lower body, leading to the dreaded over-the-top move — will make your swing rely completely on timing and expose you to both blocks and hooks.
 In looking at the greats of the game from yesteryear, many players lift the heel — the lead heel, that is — on the backswing and then slammed it down again to start the downswing motion. With the advent of technology such as Swing Catalyst balance plates, we can now see and measure the kinetics of the swing while assessing how footwork can affect club movement. Since working with the Swing Catalyst in our coaching at the Golf Learning Center, we have realized how such common swing faults as “early extension” and “casting” can be easily cleaned up with improved footwork. Also we have been able to create more power in clients’ swings by focusing on the timing of the foot-to-ground connection.
 A great way to achieve this set up balance is with the following motion-based exercise. First, set up in your normal address position. Next, lift the TRAIL foot slightly off the ground and then put it back down to the ground (Photo 3). As soon as the trail foot hits the ground (Photo 4) swing the club back (Photo 5). This will give you a higher percentage of pressure on the lead side before you swing the club but you will easily shift the pressure to the trail side on the backswing.
 Now that you are loaded into your trail side near the top of the backswing, you have to aggressively move that pressure back towards the front side before your club changes direction at the top. Here is where the classic heel slam truly helps the body pivot in the swing. Aggressively push the lead heel back towards the ground early in the transition from back to downswing as in Photo 8 (again on the Catalyst, with the transition captured on screen) and Photo 9. This will move your front side of your body toward the target as your pressure quickly starts shifting back toward the target. This is a critical move with the body to eliminate early extension and casting. Your pivot will support the hand path and club movement on the down- and through-swing.
 By slamming the lead heel to help sequence the downswing, your pelvis will move laterally to the target and drop slightly as your body squats into the ground by the time your lead arm is parallel to the ground. If your swing is plagued with early extension of the body on the downswing (Photos 10 and 11, with the Catalyst screen clearly showing weight out on the toes), this is a move that’s critical to blend into your downswing motion. When your pressure moves forward into your toes and stays there in the downswing, your pelvis has no option but to move inward toward the golf ball. This creates ball flight errors of blocks and hooks and general inconsistency of club movement through the hitting zone.
 Casting of the club, also known as early release of the hands, from the top of the downswing is something that we see frequently in amateur players on the practice tee. This occurs when the lower body doesn’t move laterally early in the downswing so pressure stays, or often increases, on the trail side in the downswing. Photos 12 and 13 show this all-too-common flaw; the Catalyst inset shows too much weight remaining on the right side. By slamming the lead heel into the ground to start the downswing transition you will be able to keep the shoulders stable as your pressure moves towards the target. This lateral shift of the lower body keeps the hands relatively calm in the first half of the downswing so that it appears they wait until the lead arm is parallel to the ground to start pitching the club head out.
 From this balanced and slightly squatted midpoint of the downswing, it is possible to start lining up the club at impact with the lead arm and make the hand path move up and inward, as in Photos 14 and 15 (the Catalyst screen shows almost full weight transfer at this point in the swing)
 This is a powerful motion that also produces clubface control and accuracy of ball flight. Having the ability to push off both feet from the ground at near lead-arm-parallel on the downswing helps rotate and elevate the pelvis, which in turn aids the club head to whip through the hitting zone.


