Everybody wants more golf consistency. Defining that is sometimes hard and often unattainable in golf’s current form.
For most I would define it as making decent contact most of the time and hitting the ball within a relatively discernable area or pattern. That definition of consistency is definable, and if need be can be measurable.
Case in point: “I hit ten balls and eight of them felt relatively solid while nine of them went into an area of five yards left of the target to fifteen yards right of the target.” That would be absolutely fantastic instead of hitting fat or thin and left/right uncontrollably, right?
However, an important concept to grasp is that in the “inconsistency” that most golfers experience there still in lies a series of patterns.
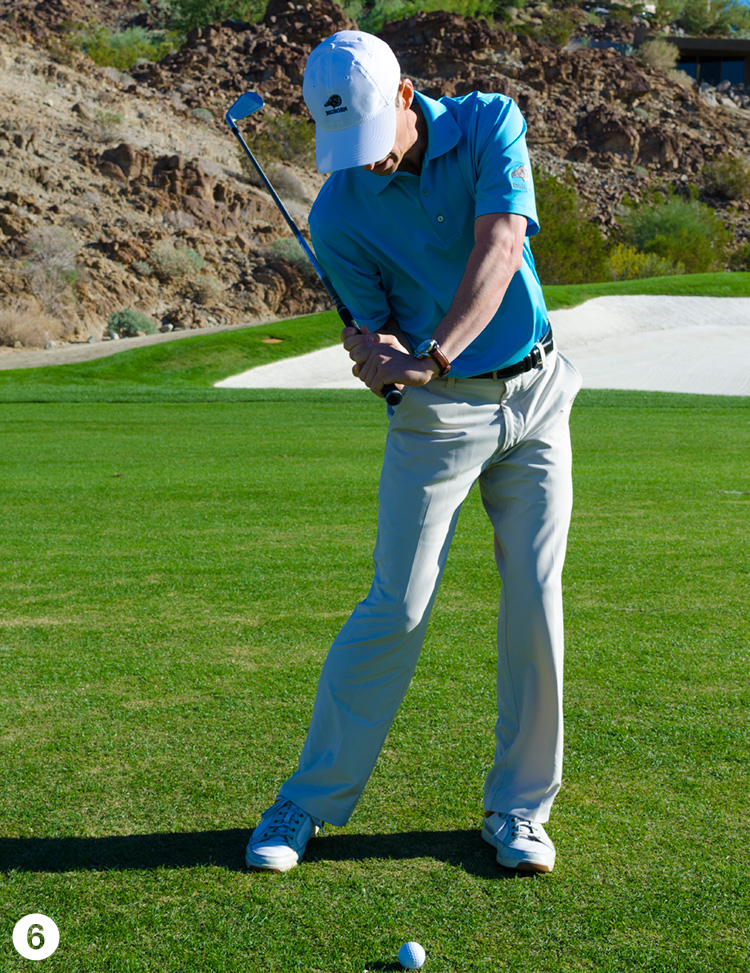
One that I have seen quite frequently lately involves students perceiving that they are hitting up on the ball as they hit it fat or potentially top it. While that is certainly a possibility, I see far more of the opposite—a lot of very steep attack angles accompanied by the thought that they need to hit down on the ball more to A) hit the ball more solid and/or B) get the ball in the air.
Should I Hit Down on the Ball?
In general the answer is “yes” with an iron. However, the direct answer is not the whole story.
Let’s put a few things on the table and go deeper into why this is potentially a reason you keep hitting behind the ball or topping it.

In the figure above there are three lines—yellow, blue and orange. The blue line represents where the golf ball launches, and the yellow line is the amount of loft that is presented to the ball at the moment of impact. The ball is placed into the air by deflecting off the loft presented to the ball. So, the launch angle (blue) will always be lower than the Effective loft (yellow).
There is also a relationship to be understood with the orange line, which is the Angle of Attack (AoA). If you make the orange line move down more, i.e., hitting down on the ball more; everything being equal it will drag the yellow and blue lines along with it.
This is where the true lesson really lies. We are humans playing a game and we have an input of information as well as preferences like where we want to see the ball launch in the sky. Our hypothetical situation is this:
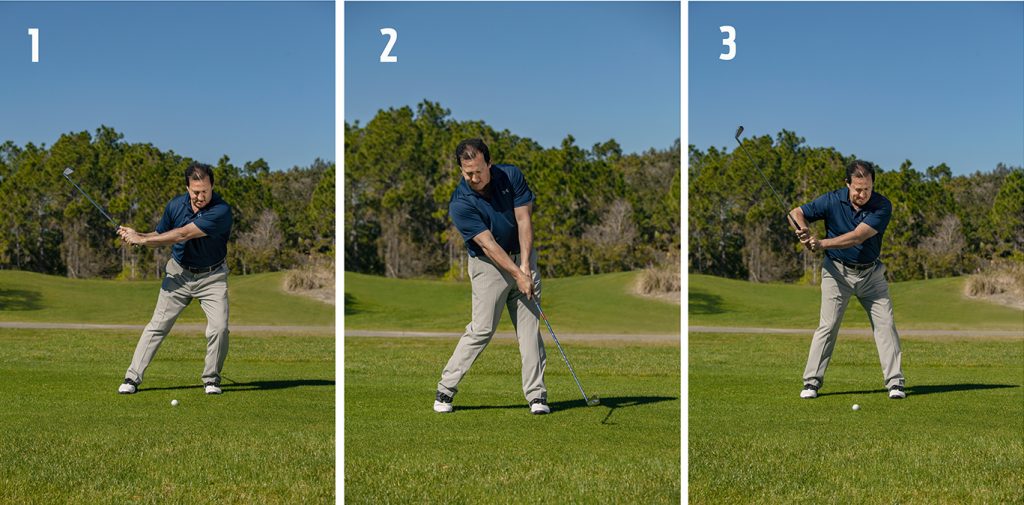


 In this skill challenge the golfer must figure out a way to allow for the club to strike the ground forward of the ball with an iron. We start with my 3-tee exercise (Photos 1 & 2) to get feed-back. If done correctly the golfer will strike golf ball first and ground second. (Photo 3)
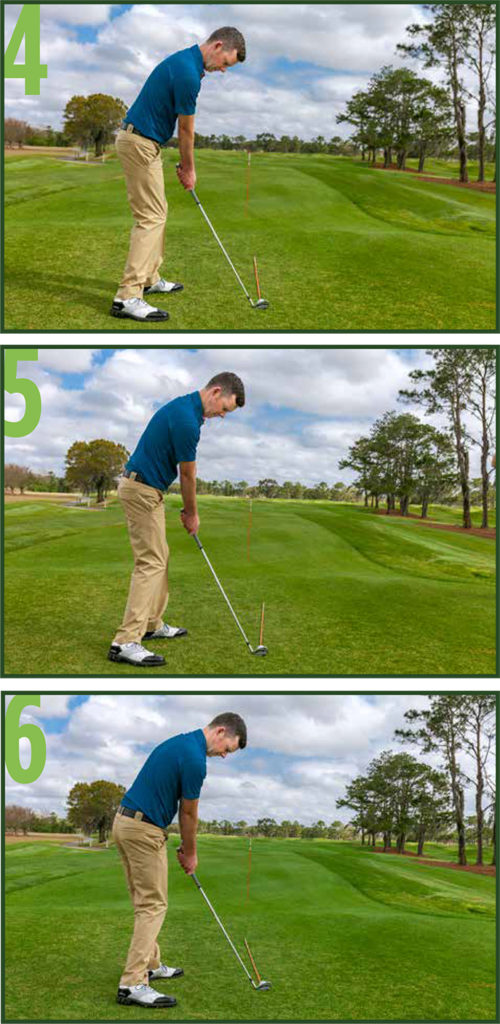 In this skill challenge the golfer must figure out a way to get the ball to start on the proper line. The orientation of the club face at impact is, of course, responsible for where the ball will initially start. If the golfer prefers to hit the ball as straight as possible, the goal is to get the face as square to the target as possible at impact (Photo 4). If the player draws the ball, the goal should be for the ball to start right of the target (Photo 5). If the golfer fades the golf ball, the goal should be for the ball to start left of the target (Photo 6).
 If the golfer prefers to hit the ball as straight as possible, the face and path must be both working in the direction of the target at impact (Photo 4), if the golfer fades the ball, the club face must be left of the target at impact with a club path that is working even more leftward, or an out-in path (Photo 7). We call this a club face that is “open” to the path. Finally, if the golfer draws the ball, the clubface must be right of the target at impact as the path works even more rightward, or an in-out path (Photo 8). We call this a club face that is “closed” to the path.
 Let’s talk “down” first: the ability to allow (not cause) the arms and golf club to fall down plane.
 I hear teachers talk about tension and discuss grip pressure, but I believe that grip pressure is too elementary an explanation. I think any tension in the upper extremities (hands, arms, shoulders, or neck) will do great damage to the ability of the player to freely swing the club head in an on-plane downward descent. Master your tension levels and make Isaac Newton your friend and learn how to enjoy higher compressed golf shots.
 I have developed a wonderfully simple training aid called the TP Balance Board (see it at


 As you can see here, a one-piece takeaway leads to a wide swing arc (Photos 6 and 7). My lower half remain stable as I complete my backswing (Photo 8). As I initiate my downswing by clearing my hips my swing arc has narrowed and my wrists are still cocked (Photo 9). It’s very important to clear the hips first so getting into this position is possible — if the arms start first this angle is broken leading to poor impact (Photo 10).


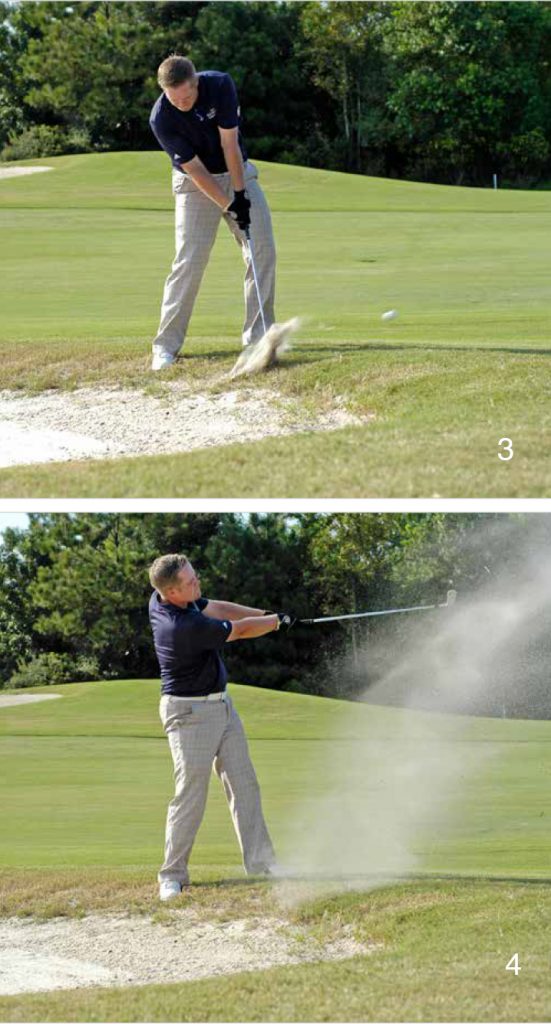

 We are going to play this like a fairway bunker shot by moving the ball back in my stance a little. The key to uneven lies like this is to make sure that you have good footing. If your feet move, it makes it hard to get into a good impact position. I will take an extra club to make sure that even if I mishit it, I have enough club to get to the green. Depending on the severity of the uneven stance you may have to take two clubs more and just take an easy swing and keep my footing nice and stable, as I do through the swing sequence shown here. By keeping your feet stable this will restrict your follow-through and can cause the ball to fly a little lower than normal.


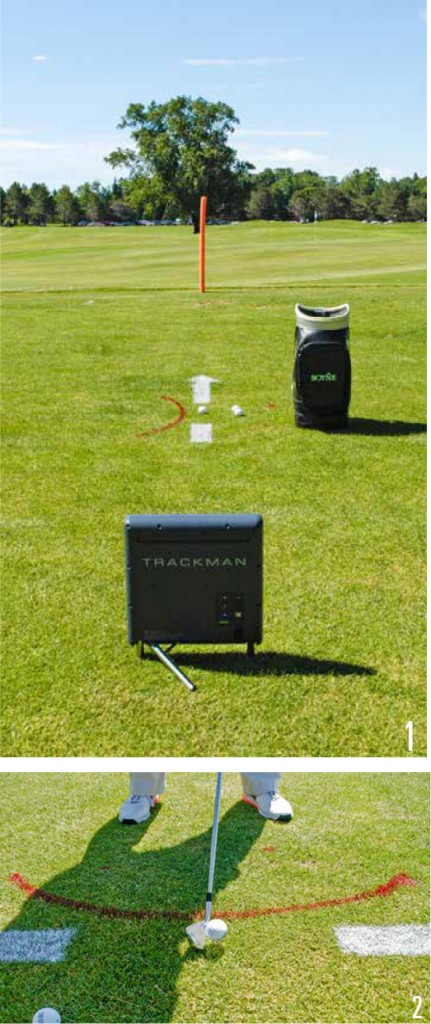
 Like many full-service teaching facilities, my staff and I at Boyne Resorts use Trackman and other technology like GEARS to help our students get a firm grip on their golf games. These tools help them, and us, find out how all the elements of a swing — club path, angle of attack, clubhead and ball speed — work together to yield great shots. Above all, that means knowing what the clubface is doing at impact, which ultimate gives you the power to shape your golf shots.
 I use a golf tee in this drill so the ground isn’t a factor — it’s just clubface and golf ball (Photo 2). Learning to curve the ball is important. I am using a 7-iron here, setting up for a draw or fade in relation to the swimming noodle.
 To get the ball to start to the right of the noodle and curve back — a draw for righthanders — the path that you swing your club needs to be inside to outside, and the face needs to feel like it’s closing, like a door on hinges. The only contact we have with the golf club is with our hands. So you need to learn how to use the hands in relation to the face.
 I’ll start with a square stance in the set-up (Photo 3), and to get the ball to curve right to left, I’ll move the left foot forward and the right foot back, as in Photo 4. That gives you more space to swing from the inside. A lot of times, the club will go where there’s room for it to go. When you start from this position, you’ll feel like you’re coming from the inside, but the face has to turn down and close in the position shown in Photo 5. Most people try to get the face to close by using their bigger muscles, so they end up throwing their right shoulder too close to the ball and target line, and that’s what’s called “over the top” or “outside to in.” So we are going for “in to out” with the face going down.
 I take mini-swings, waist high to waist high, trying to get the club to close and rotate. Photos 6-8 show what I mean. From there I’ll look at the target to get a sense of where I want the ball to start and where to end. Then I get a nice little draw pattern. The Trackman is also tracking the spin access of the shot, the shape of it. Technology sometimes scares people, but once they know that a positive number is to the right and a negative number is to the left (as illustrated in the sidebar, via photos taken in our indoor fitting center), they can see their shot shape. In a drill like this the numbers will be exaggerated.
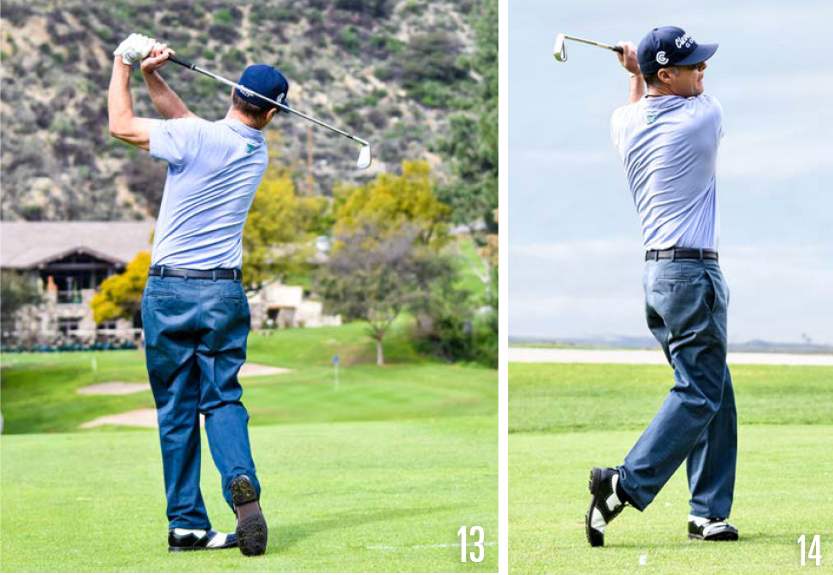
 The other shot shape to learn, which most people are good at, is the fade or slice. To get there, the club path is opposite of a draw. I’ll set my body slight open to the target line (Photo 9), and swing the golf club along the body line (Photos 10-12), trying to get a sense of feeling the face still looking at the target after the strike — more of a position like that shown in Photo 13.
 The idea is getting the student to understand 1) Why we’re doing the drill and 2) The ingredients of each shot shape will help them get an idea of why the ball does what it does — the relationship of club path and face of club relative to the path. That’s a basic understanding that’s very simple, even though it might sound scary to some.